

1992 Classic Mini Track Car

Some back story to the car.
Its a 1992 Rover Mini British Open Classic, one of 1000 built. Originally bought in 2013 (when I was 15), myself and my dad spent 2 years building it up to be my first car, during this build she was given the nickname “Kate” due to the number plate.
I then used the mini as my daily for just over 2 years. In 2017 the car needed a differential change, I ended up taking the mini off the road and decided to do a full turbocharged track car build Although life has got busy, the car was driven into the garage at home and the build was started !

First job was to start stripping parts! First up the bonnet, engine and entire front subframe which as you can see houses the brakes, suspension and hubs!

Next up was to attack the rear and center of the car! Interior stripped out along with the full length webasto sunroof and all the glass. Also the rear subframe was removed as well as the all off the lights and fuel tank! What was left was a bare shell . Time for full inspection!

Next up was a big decision to make, I decided to send the body off to get welded up due to it being so far gone and the circumstances not being right to do it myself. The shell ended up having a major list of new panels! The month I sent the shell away for welding, Covid 19 lockdown happened which held the build up even more.

Fast forward a very strange year for all of us, the mini came back! New panels all round, the bumper lips removed and smoothed off to give me the exact look I’d planned of all that time ago! Slowly the vision was becoming a reality.

My next plan was to refit the freshly powdercoated front and rear subframes, purely so I had a solid base for the axel stands to go. This allowed me to safely get underneath and start the long process of prepping the underside for undersealing.

I wish I stayed as clean doing this part of the build as I have done writing this blog post for you all! It was done, the main section of the floor all cleaned, stripped and sealed. Subframes then removed so I could change the axle stand location so allow for the rest of the floor to be cleaned and sealed!
Then the exciting part… Shiny Bits !!!! The first new part to be fitted was the Quick Ratio steering rack. Now the track part of build began.

This day was a real eye opener for myself. The front subframe was fully built to a high spec and ready to be bolted into the car. The spec consists of fully adjustable alloy tie rods, 4 Pot titanium alloy calipers paired with 8.9” Grooved and vented discs and alloy drive flanges. Adjustable Gaz lowered shocks alongside heavy duty aluminum adjustable trumpets with medium strength springs. This is still one of my favorite parts of my build. It was starting to look like the race cars that I used to see whilst growing up!

This is purely just an excuse for me to show you how it all looked together !!

The rear subframe got the exact same treatment and built up to the high standard! The noticeable difference from the front is the brake set up. Due to minis having drum brakes at the rear and hearing that fitting a disc conversion gives too much brake effort, I decided to fit superfin aluminium drums. This will assist the cooling whilst still giving a comfortable amount of brake effort.

The milestone day! Engine went in to make sure it finally cleared the bulkhead. Due to the turbo placement, a box had to be welded in the bulkhead to allow clearance.
All 4 wheels on the car, a rare set of SSR Formula Mesh 3 piece splits. This set was reportedly imported from Japan in the 1980’s. These are 1 of 3 sets known this spec. Definitely gives it that extra look in my opinion!

This was certainly a day of work! Fitting a full multipoint bolt in rollcage consisting of Bulkhead bracing; Dash bar; Cross side intrusion door bars; Rear Cross bracing; Roof Cross bracing and harness bar.
Prior to fitting I cut the existing dash out, after fitting I then ended up cutting more of the rear seat base out too!

In this photo Id mocked up the seat placement so I could reach my lightened pedal box comfortably. Made up a seat frame and welded that to the floor for strength. I then drilled through these to fit my cobra seats along with the cobra seat mounts. Everything was working well, now a new problem became apparent. I couldn’t reach the gear stick due to moving the seats further back from their original mounting position.
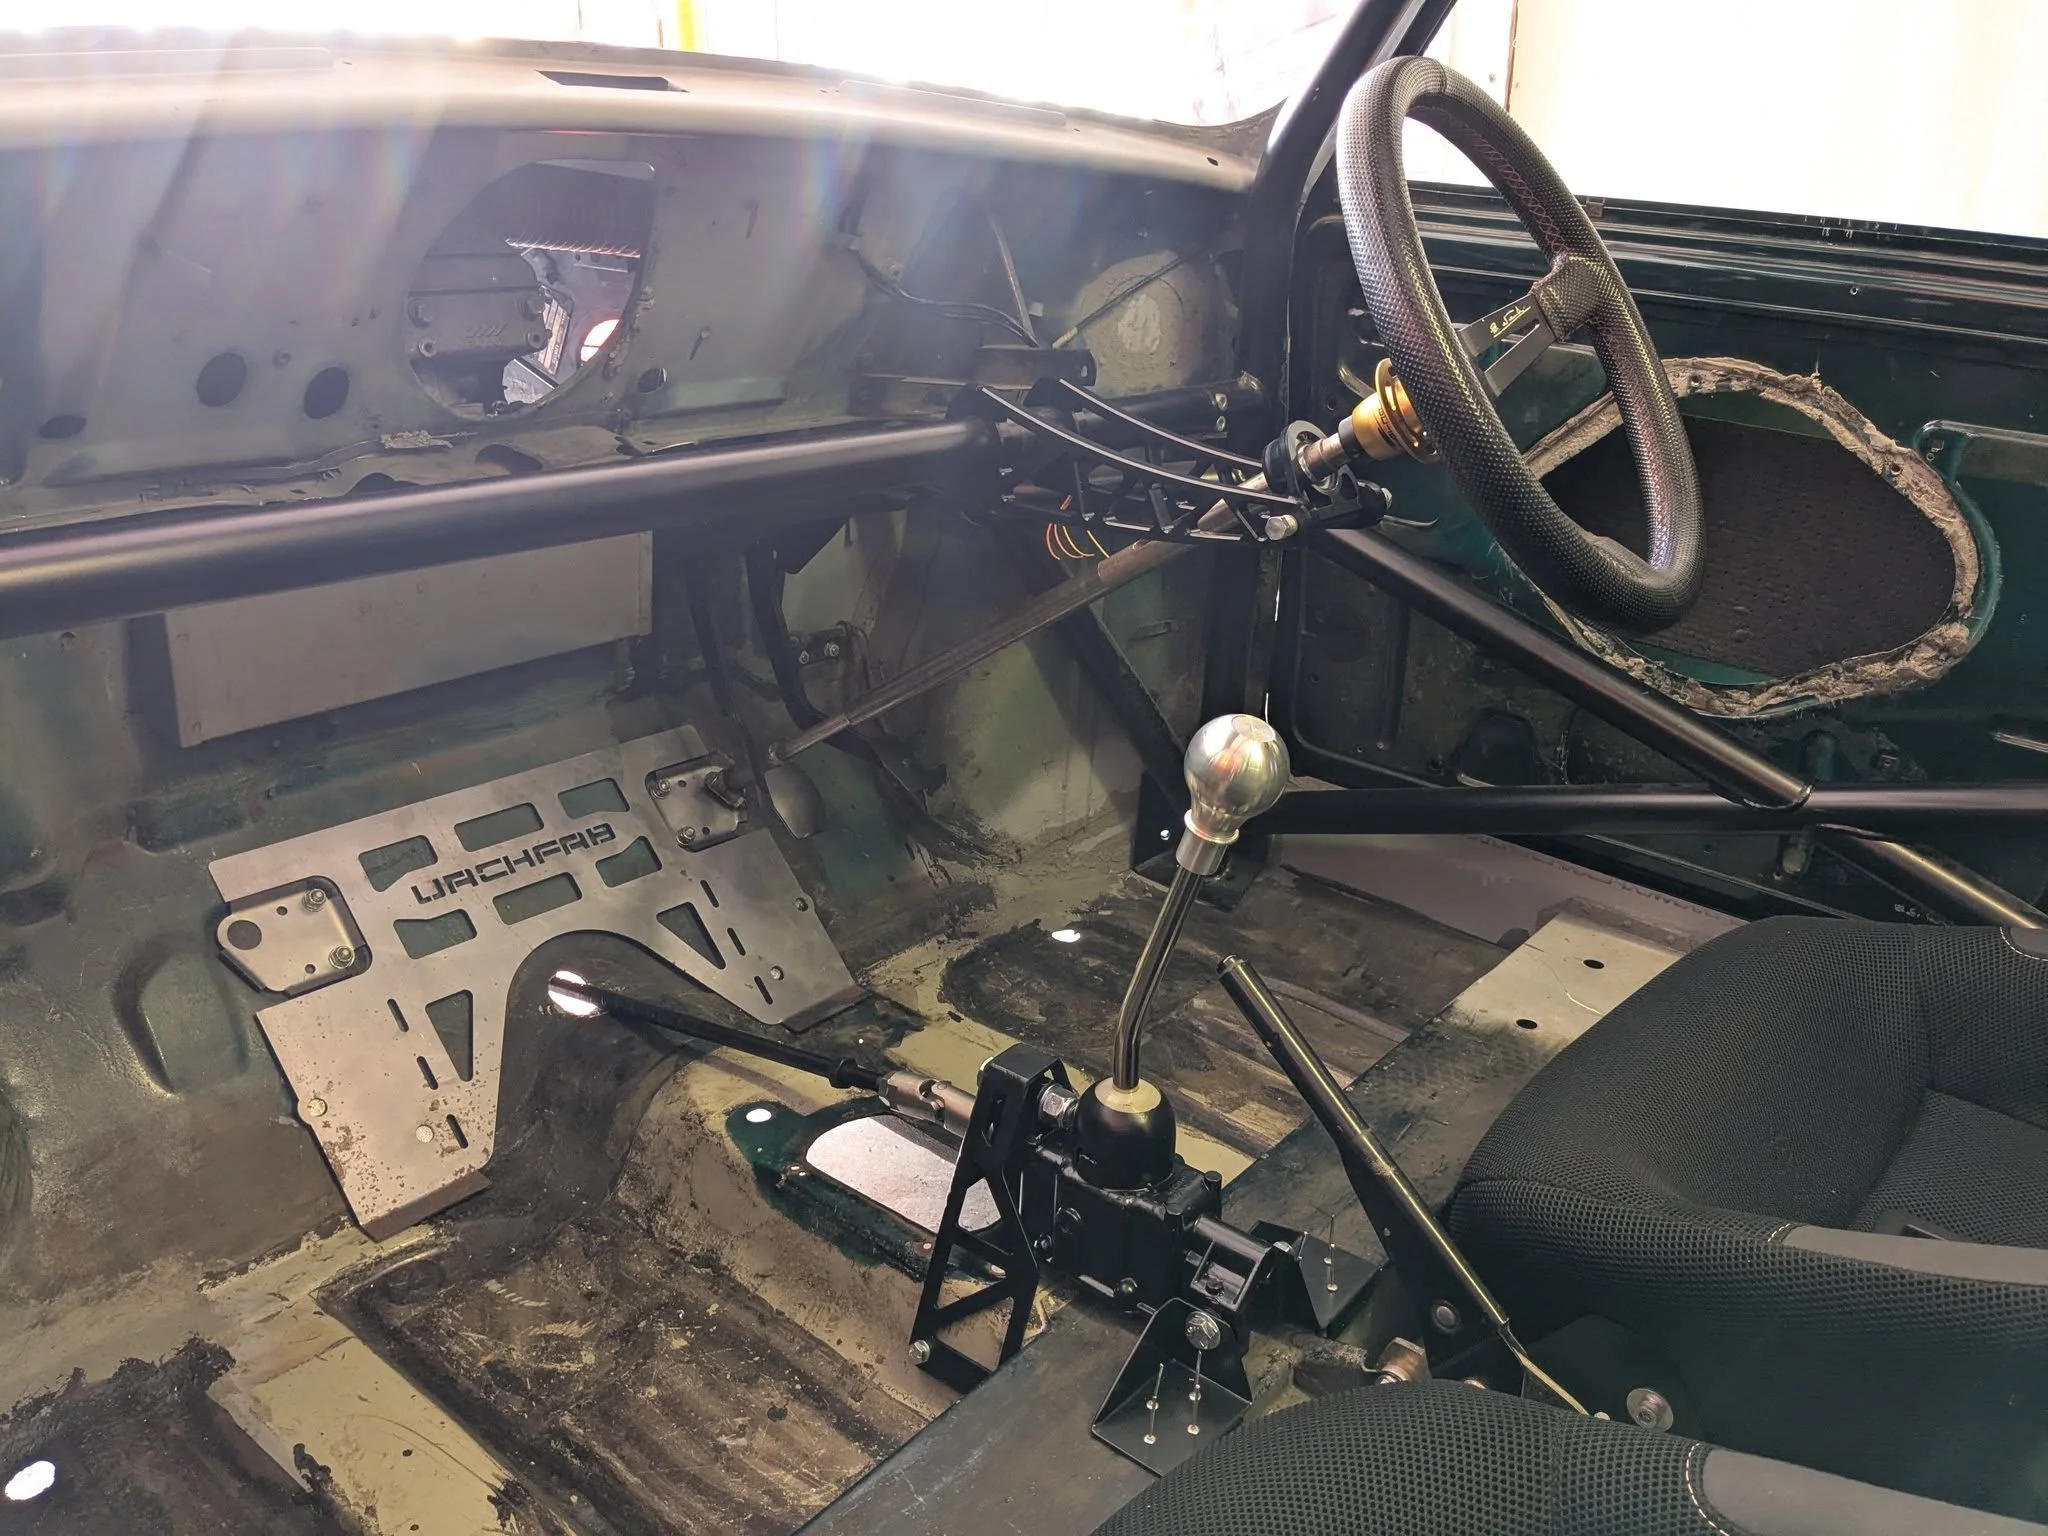
After a while of researching and coming up with a plan, I stumbled across the KAD Internal Linkage kit. this allowed the full gear selector to be raised up inside the car, mounted internally and brought further back! Spot on, drilled a small pilot hole through the floor and puled string through it so I could tie it onto the selector shaft on the gearbox. This allowed me to get the right angle to drill the bigger hole and tidy it up so I could fit the the new selector rod to the gearbox and selector box. Everything works and fits and I genuinely couldn’t be happier!
Also see in the photo the billet aluminum column support from Urchfab which holds my Go Race quick release steering column just right!
Also got a floor strengthening plate from urchfab which needs to be welding in. This plate stops my floor getting damaged from the front subframe which I’ve solid mounted to the car!